Seeing colorful blooms in the spring time is a sign for new beginnings and sunny weather. Whether you’re a seasoned gardener or a beginner just testing the waters of bulb planting, follow these tips and tricks so your garden is sprinkled with color come spring.
Picking the Perfect Spot
Spring blooming bulbs need at least part sun throughout the spring. These places can include beneath trees, in drifts, amongst wildflowers, and mixed with spring annuals in containers.

Label Your Bulbs
After you have picked out your perfect bulbs, one of the most important steps is marking them. You can utilize a stick, popsicle stick, rock, or tag so you know where you planted them while they lie dormant. These markers will help you keep track of where you placed them so you don’t accidentally dig them up when planting other blooms or weeding.

Dig Large Holes
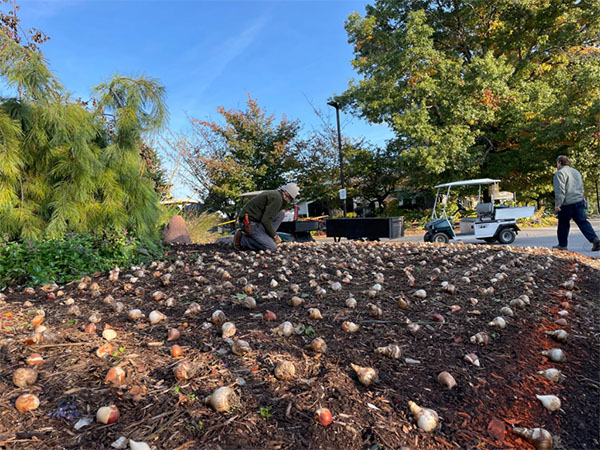
Because bulbs can be as small as the size of your palm, you may be tempted to place each individual bulb in their own small hole, but you should opt for the larger hole. When you go with a larger hole, you can plant your bulbs in clumps, instead of several small holes. This will be more impactful for the same amount of work put in with planting in several holes. For optimal growth, make sure you watch out for those pesky weeds so you can remove them.
When you prepare the hole, you must take other measures to ensure the coziest bed for your bulbs. For the best growth, make sure that you remove weeds and loosen the soil. It is also a good idea to add compost for nutrients or sand for drainage before you plant.

Layering Bulbs
One unique planting strategy with bulbs is to layer them in a large, single hole. Basically, plant bulbs of differing varieties at different depths within the hole. For example, you can plant large allium deeply, cover an inch or two of them with soil, and then plant a layer of another bulb type at this elevated position. Once you cover this second type, you can plant yet another bulb type.
When they bloom in spring, the ongoing complementary foliage will last weeks as the bulbs continually grow through the soil until they peek through the top layer.
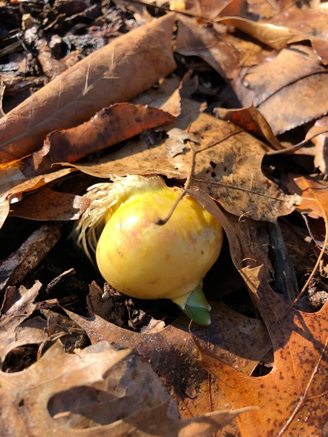
Remember when you plant your bulbs to plant them facing upwards. Examine your bulbs carefully to ensure the roots will be facing down.

PC: Teresa Riehl
When to Fertilize
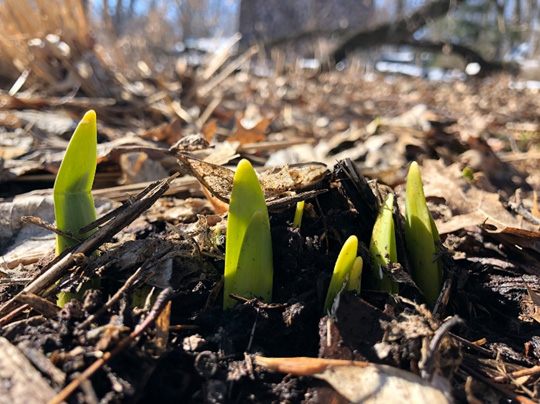
If you want to enhance the size, color, and bloom time of the flowers, it’s best to apply some fertilizer in early spring when the shoots start to push through the soil. If you want to go the extra step, you should have your soil tested to see what nutrient deficiencies there may be (we talk about that in tip #8!).
Ensure a Good Growing (and Hibernation) Environment
When you are in the planning stage of where to plant your bulbs, you need to keep in mind the surrounding environment and if there is anything that could negatively affect them. For example, bulbs need good drainage in order to make it through the winter months. There are a couple of bulb types that can handle wetter conditions like camassia or snowflake. In summary, planting in low areas that tend to accumulate water is not a good idea since the majority of spring-blooming bulbs will rot.

Divide Bulbs That Have Multiplied
If bulbs do multiply, they can be divided or moved in the spring or fall. Doing so in the spring is easier though, and should be done after blooming takes place as this is when the foliage is there. If you want to move them in the fall, it’s helpful to have marked the area as stated in tip #1 so they can be found easily and other bulbs aren’t disrupted.
Water to Establish the Bulbs
In order to promote longer blooming periods, proper watering sets a good foundation. Watering should take place when the bulbs are planted to help settle the soil and hydrate the bulbs enough to spark root growth in the fall, but doesn’t need to be done regularly throughout the fall or winter.

PC: Teresa Riehl
Want to Go Even Further? Track Your Soil’s pH Levels
One final tip is to track the soil pH. If it’s between 6.0 and 7.0, the bulbs can access the most nutrients from the soil. If your bulbs happen to be struggling despite your efforts, checking in on the soil can go a long way.
Brown County’s UW Extension Office can test your soil, but be aware that it can be difficult to wholly change your soil’s pH. You’ll likely be able to target a couple nutrient deficiencies that can be solved with an organic fertilizer.
Whatever your vision of a successful spring season, it’s unique to you and and achievable. There are no hard-set rules to what you have to do and how it should look. It may seem like a lot of work in the moment, but when the beautiful spring colors emerge, it will all be worth it!
Curious about where wild tulips originate? It’s not just Holland! The tulips that have helped create the wide varieties we love today come from the mountainous regions of Central Asia. You can check out where wild tulips are in the world with this interactive map.
Happy planting!
Sources


